Hello craft lovers! 😆 Today, we're excited to share a fun and easy DIY project with you that's perfect for anyone who wants to add some greenery to their home or garden. With our plant pot mold, you can create your very own custom flower pot that's perfect for succulents, bonsai, and more. 🪴 Not only is it a great way to showcase your crafting skills, but it also makes for a lovely and unique decoration. So, let's get started! 🥳
From there, we can move on to the step-by-step instructions. Here's an example of how you could break it down:
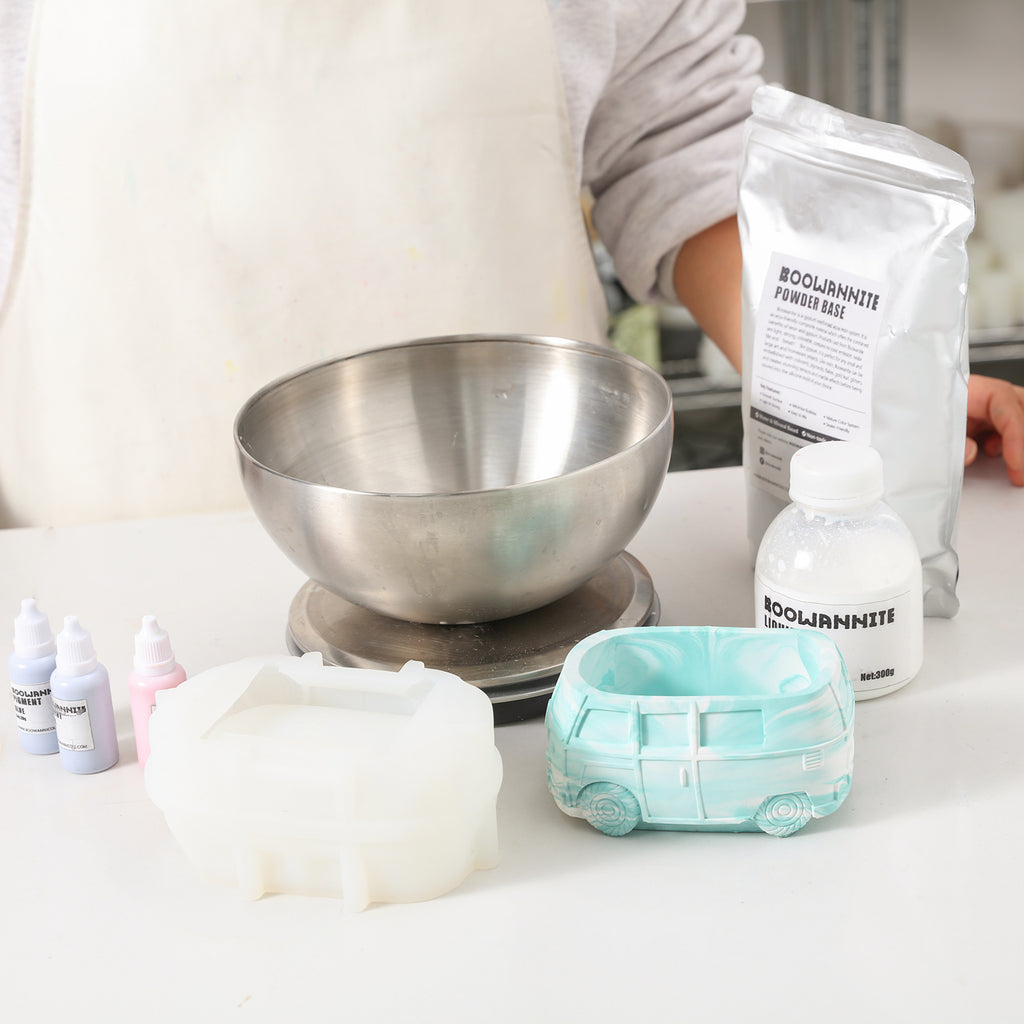
Step 1: Gather your supplies
To make your plant pot, you'll need the following supplies:
- Plant pot mold (available on our website)
- Boowannite kit (also available on our website), or you can use Jesmonite , cement or concrete
- Water
- Mixing bowl
- Mixer
- Spoon or spatula
- Sander (also available on our website)
- Paint or other decorations (optional)
- Straws or silicone tubes
- Soil and some succulents
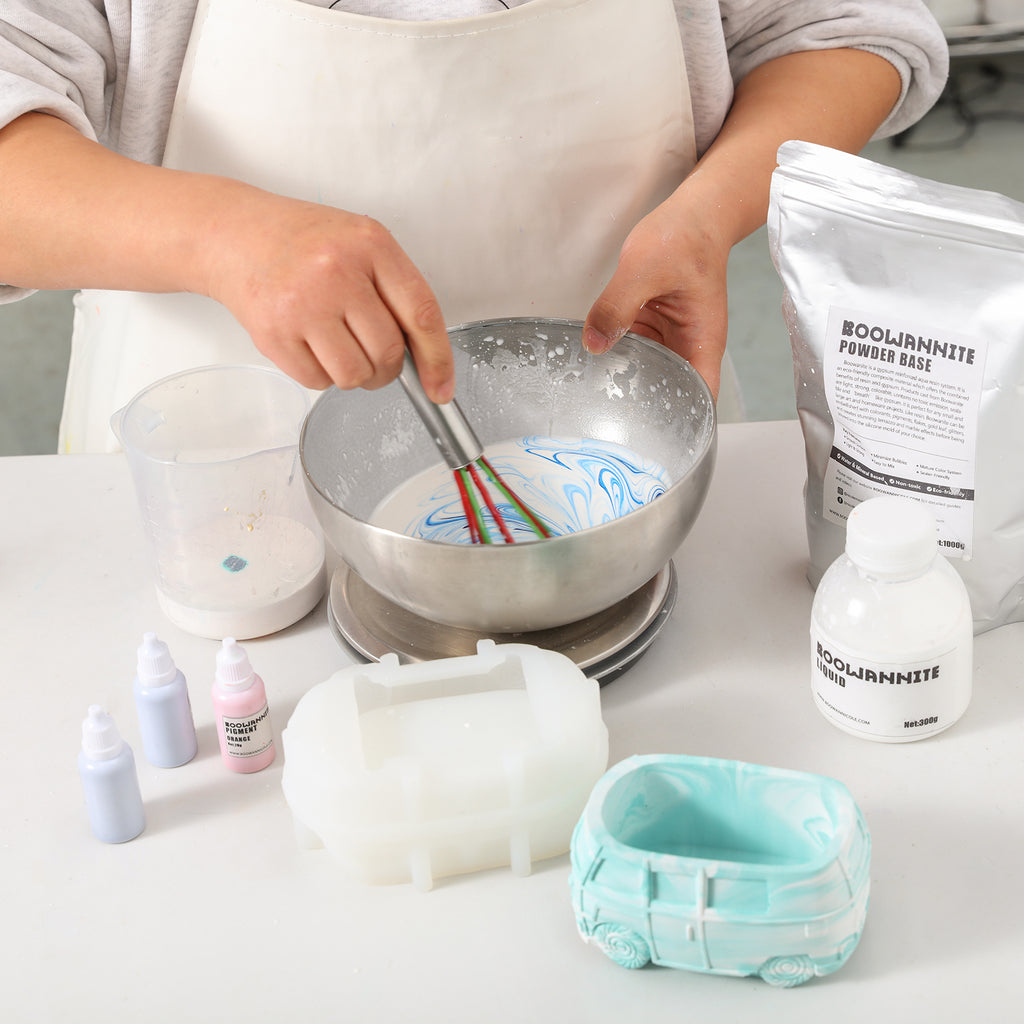
Step 2: Mix the Boowannite
In your mixing bowl, combine the Boowannite with liquid according to the instructions on the package. Stir until it's smooth and there are no lumps. Then drop in a drop or two of your favourite color pigment and mix well.
(Tips: to make this plant pot you will need 410g powder with 145g liquid) 😉
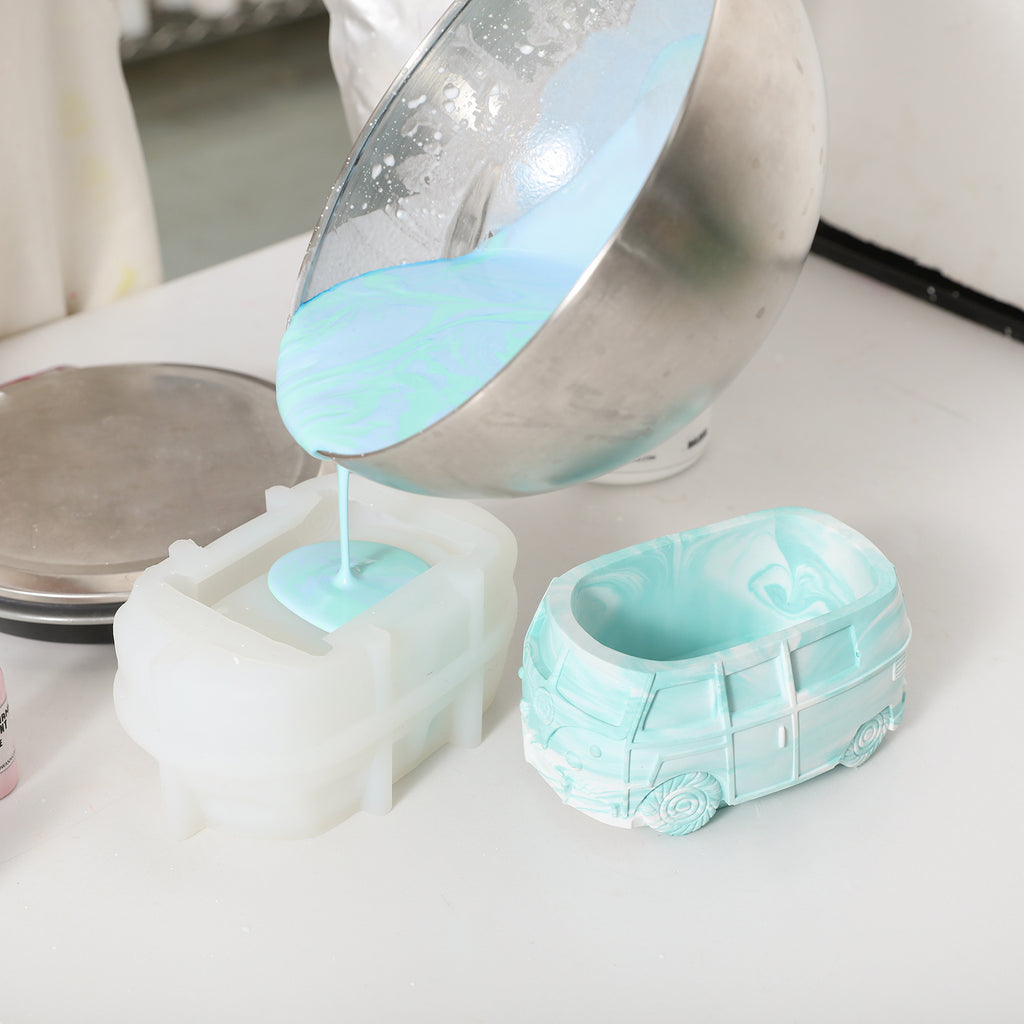
Step 3: Pour into mold
Carefully pour the mixture into the plant pot mold, making sure to fill it all the way to the top. Use your spoon or spatula to smooth out any bubbles or bumps on the surface. And give your mold a few gentle taps to prevent any air bubbles from ruining your perfect pot.
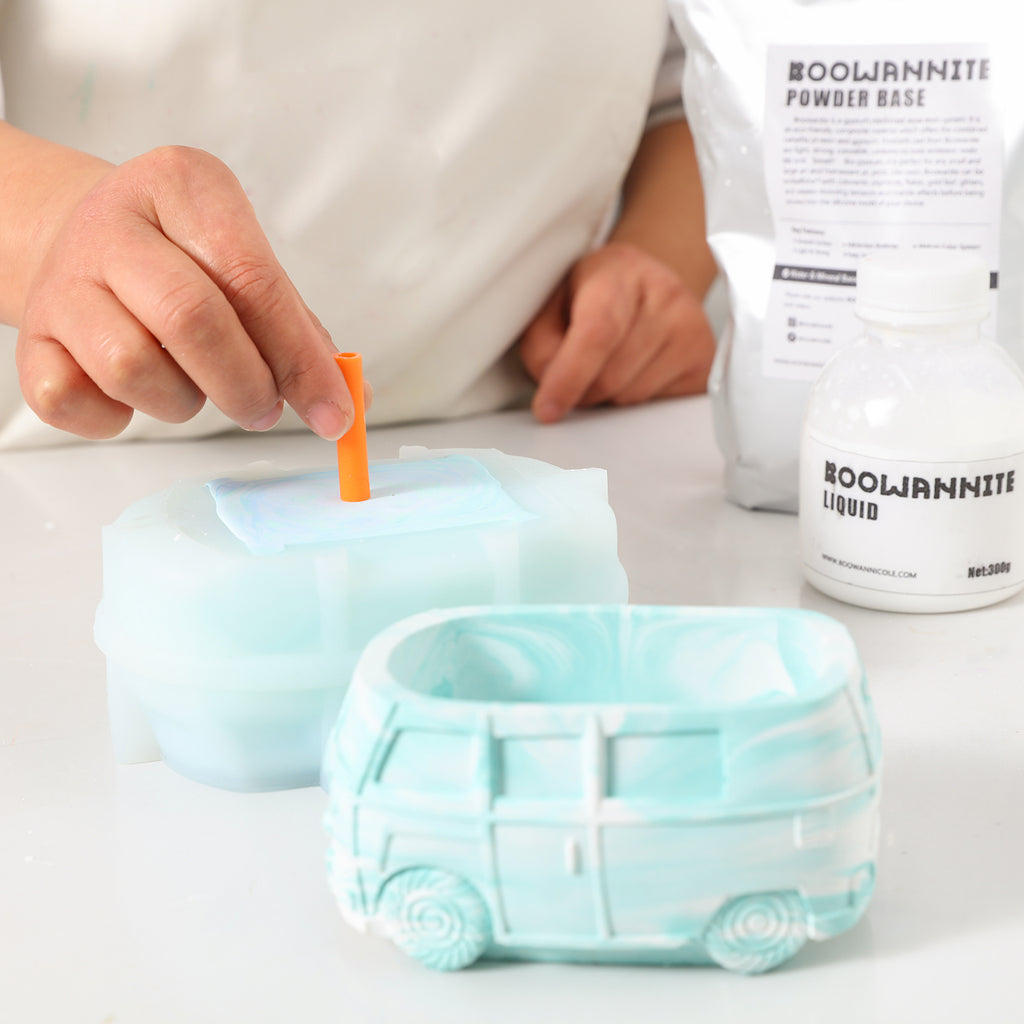
Step 4: Place a straw or silicone tube in the middle of the mold to create a drainage hole for the pot.
( Tips: The reason for choosing straws and silicone tubes is that they are easier to release.) 😉
Step 5: Let it set
Set the mold aside and let it dry for at least 1-2 hours. It's important not to disturb the mold during this time to ensure that your pot comes out perfectly.
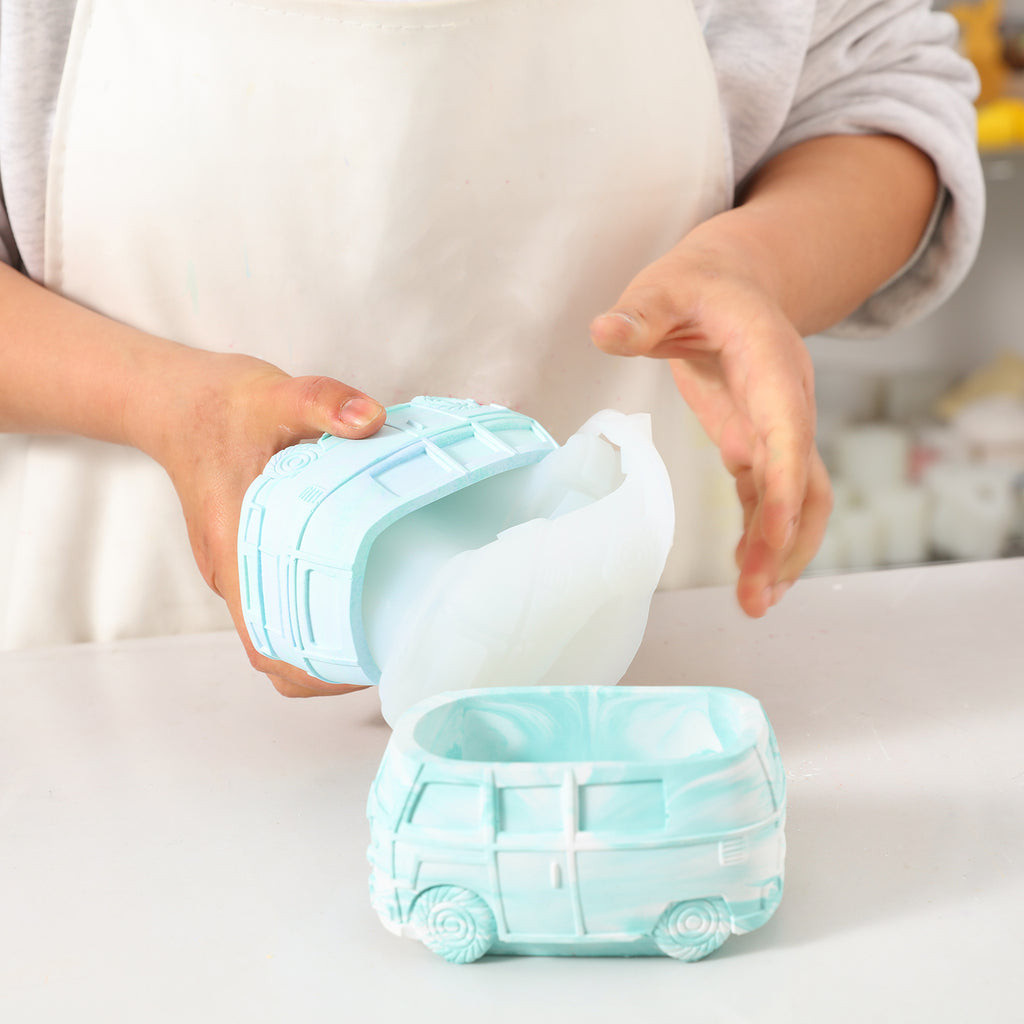
Step 6: Remove from the mold
Once the concrete has fully set, carefully remove the mold to reveal your new plant pot. If there are any rough edges or imperfections, you can use a sander to smooth them out.
Step 7: Decorate (optional)
If you want to add some extra flair to your pot, now is the time to do it! ✨ You can paint it with your favorite colors, add some designs with a marker or paint pen, or even attach some stones or beads with glue. 🎨
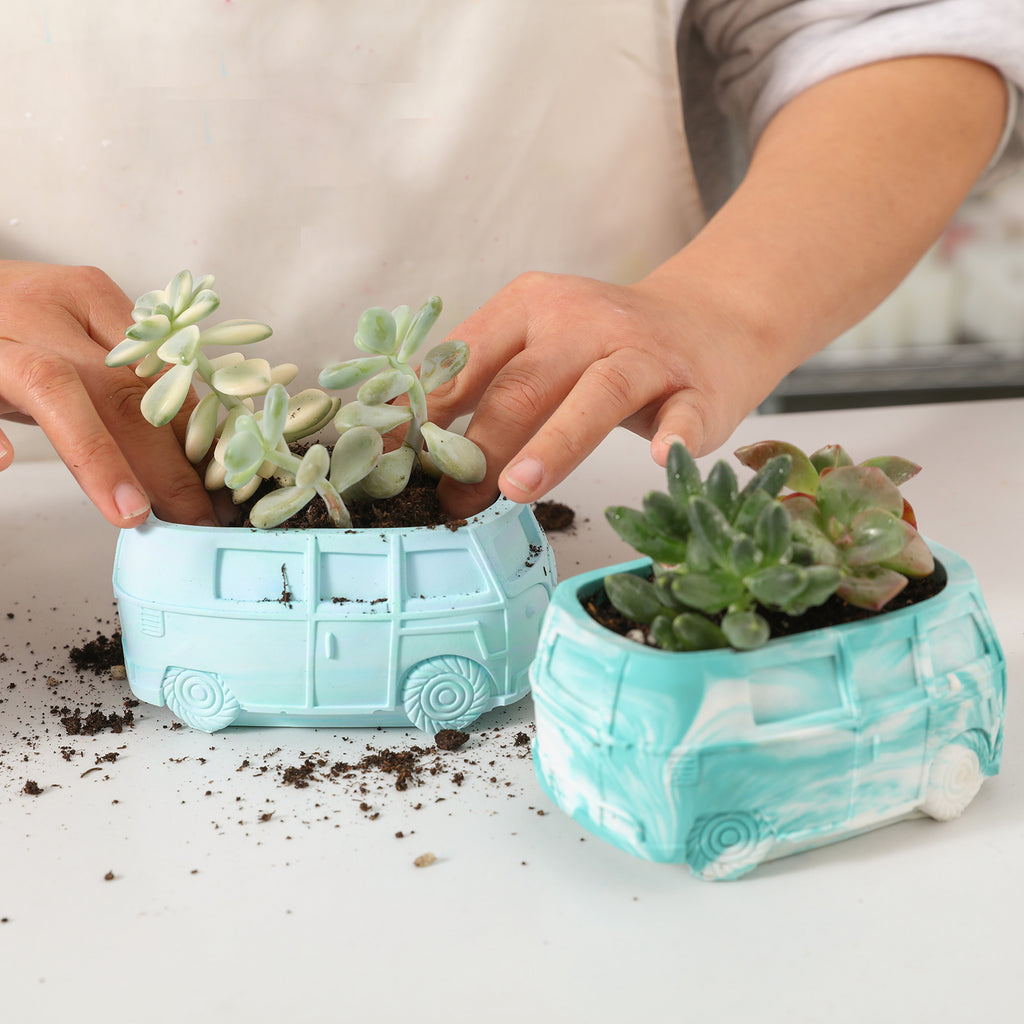
Step 8: Add your plant
Finally, it's time to add your plant! 🌱 Choose a small succulent, bonsai, or other plant that will fit nicely in your new pot. Add some soil, gently place the plant inside, and voila! You've just created your very own custom plant pot. 🌻
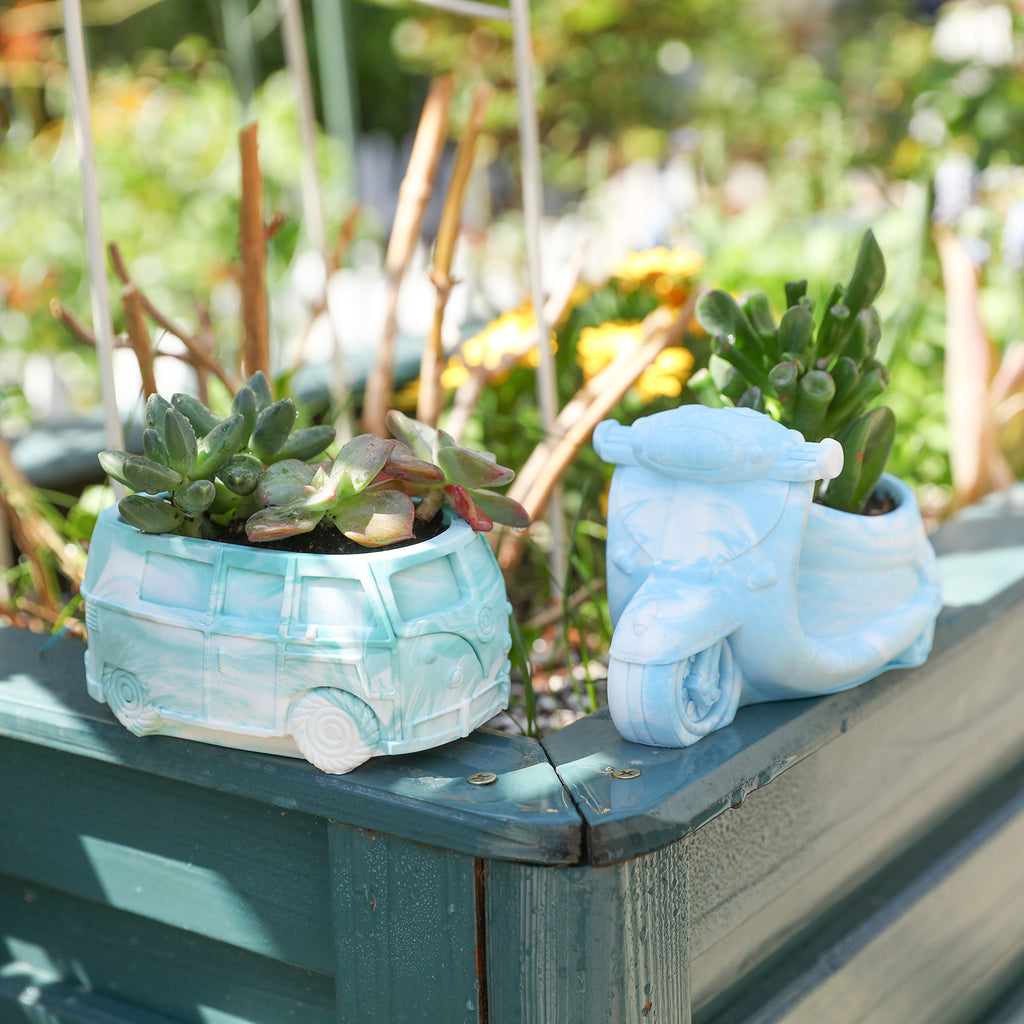
And there you have it - your very own DIY plant pot! 🎉 We hope this tutorial was helpful and inspiring. Making these pots is one of our favorite ways to unwind and express our creativity. Plus, it's always so satisfying to see our plants thrive in their new homes. If you have any tips or tricks for caring for your plants, please share them with us in the comments below. Happy crafting! 🥰


