


How To Make Concrete/Jesmonite Candle Jars Using Silicone Mold
Hey guys! 😆 Today I'm excited to share with you the step-by-step process for creating three stunning candle jars with different textures that are sure to elevate any space they're placed in! 🎀
Before we dive in, let's take a quick look at the tools and materials you'll need:

a weighing scale, a container, a Boowannite kit, silicone molds, and pigments of your choice. With that, let's get started on crafting some amazing candle jars! 😉


Step 1: Start by preparing 900g of powder - this is enough to create three candle jars with lids. For each jar, you'll need 300g of powder.
Step 2: Add 270g of liquid to the powder.


Step 3: Mix the powder and liquid slowly and evenly with a stirring stick until the paste is as smooth as cream. If there are any visible particles, remove them and continue stirring until the paste is perfectly smooth.

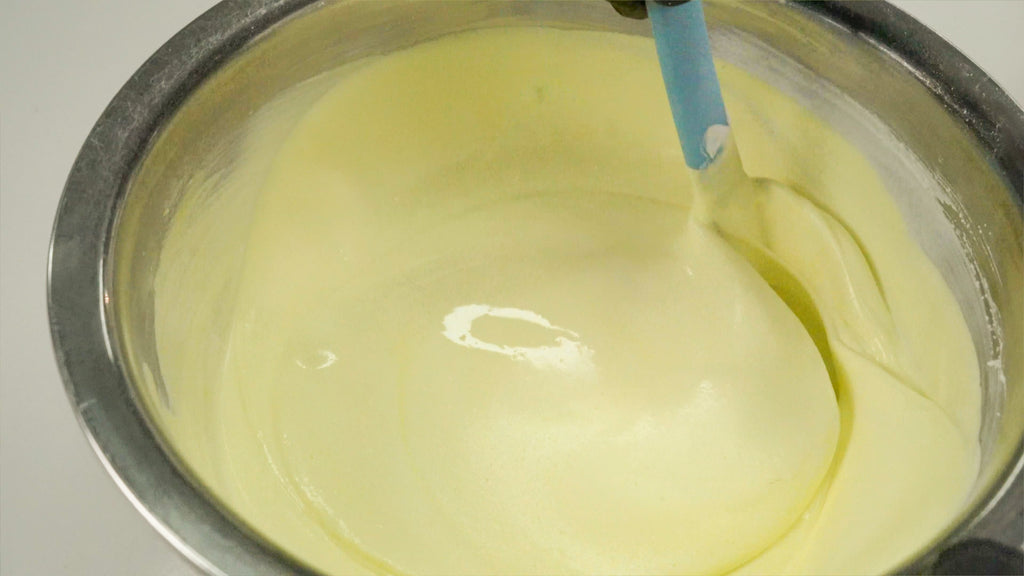
Step 4: Add ten drops of pigment and continue mixing until the color is consistent throughout the paste. You can use a mixer to speed up the process if you'd like.

Step 5: Pour the mixed paste into the candle jar molds as soon as possible to prevent the paste from setting.
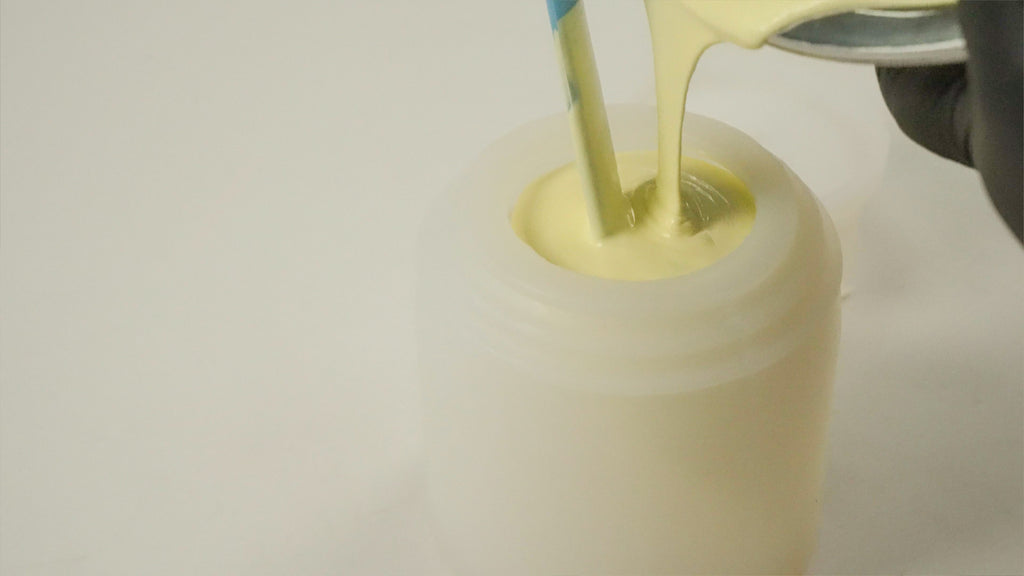
While pouring, use the stirring stick to press down on the center of the mold to help the paste pour in smoothly. Stop pouring just before the paste comes out of the mold.
Step 6: Remove any air bubbles from the molds to prevent distortion or chipped corners in the finished candle jars.
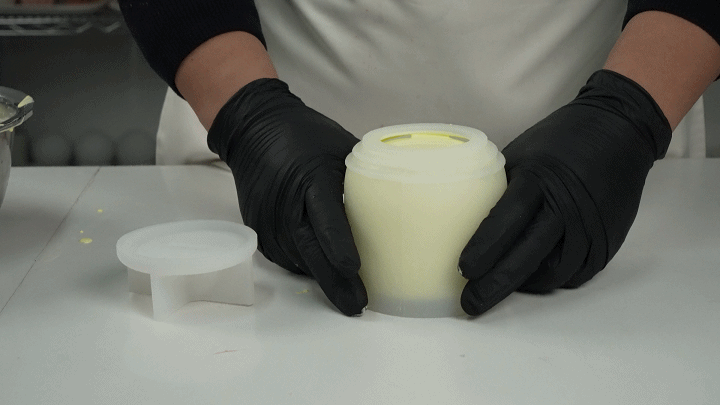
To do this, hold the bottom of the mold with your hands and gently hit the mold against a table to release the air.
Then, use your index and middle fingers to hold the bottom of the mold while using your thumbs to rub the texture of the mold repeatedly to expel any remaining air bubbles.
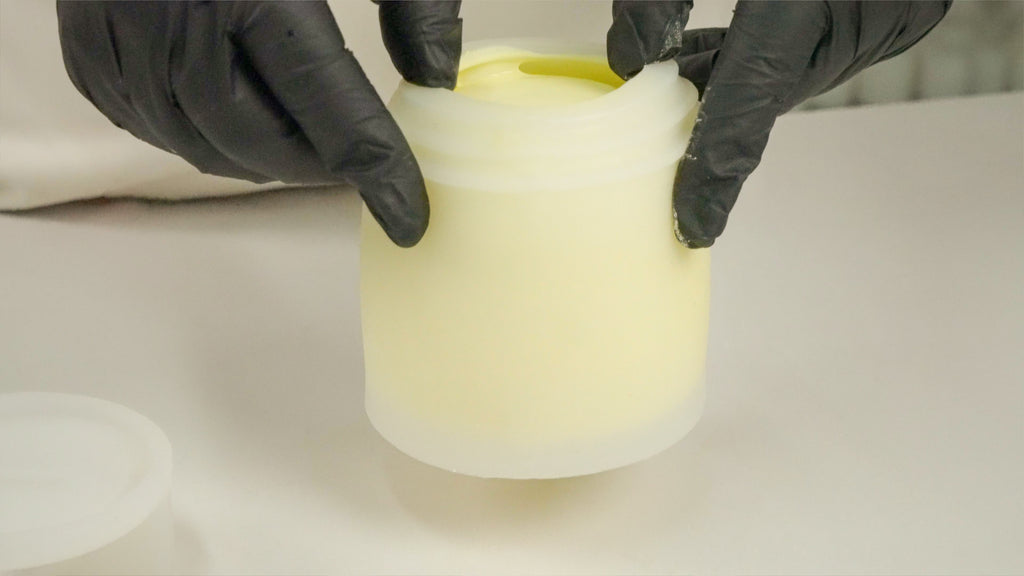
Once you've massaged all the textured areas, gently place the mold on the table and use your fingers to lift and lower the top of the mold.
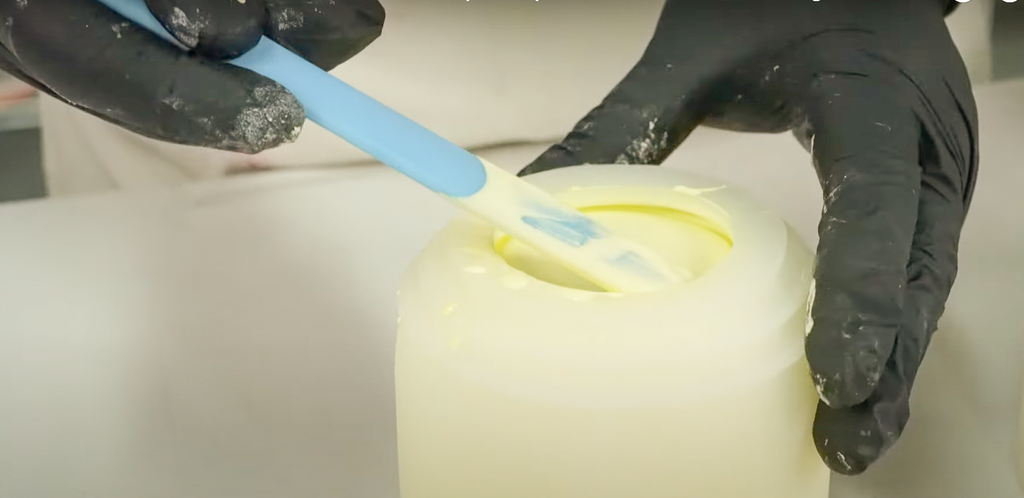
Step 7: Slide the stirring stick continuously along the mold's edge, making sure to reach it all the way around. Then add a small amount of paste and repeat the mixing action above before gently lowering the mold.
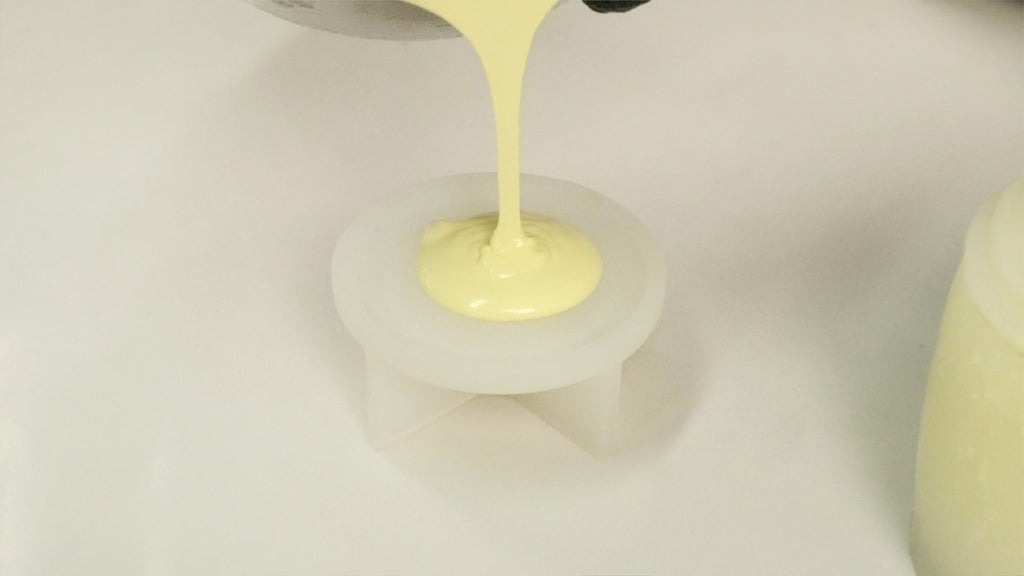
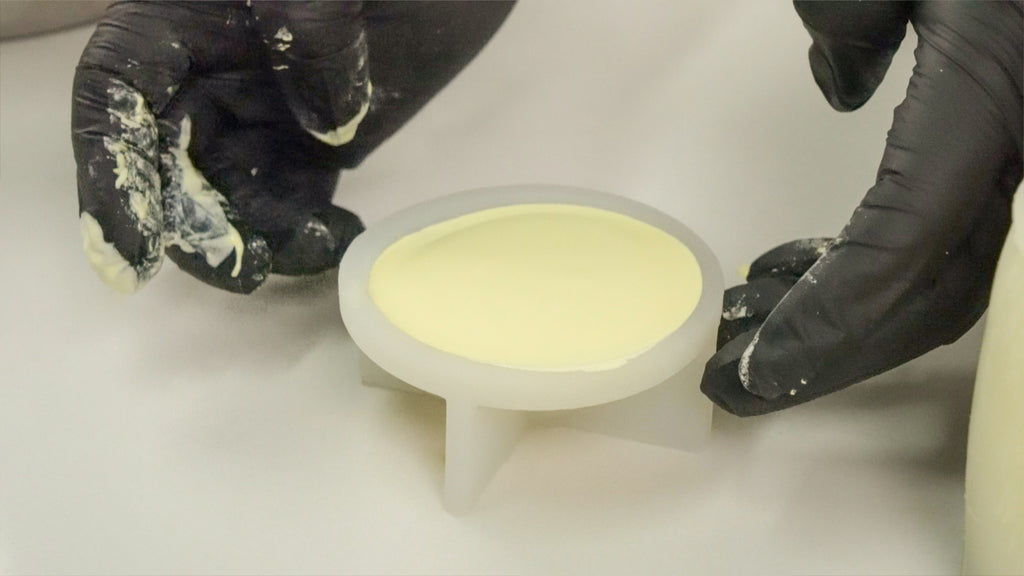
Step 8: Make the lids for the candle jars by pouring a small amount of paste into the mold and tapping it gently to release any air bubbles. Then, pour in the rest of the paste to fill the lid.
Step 9: Leave the candle jars to set for 3-6 hours, depending on the ambient temperature.
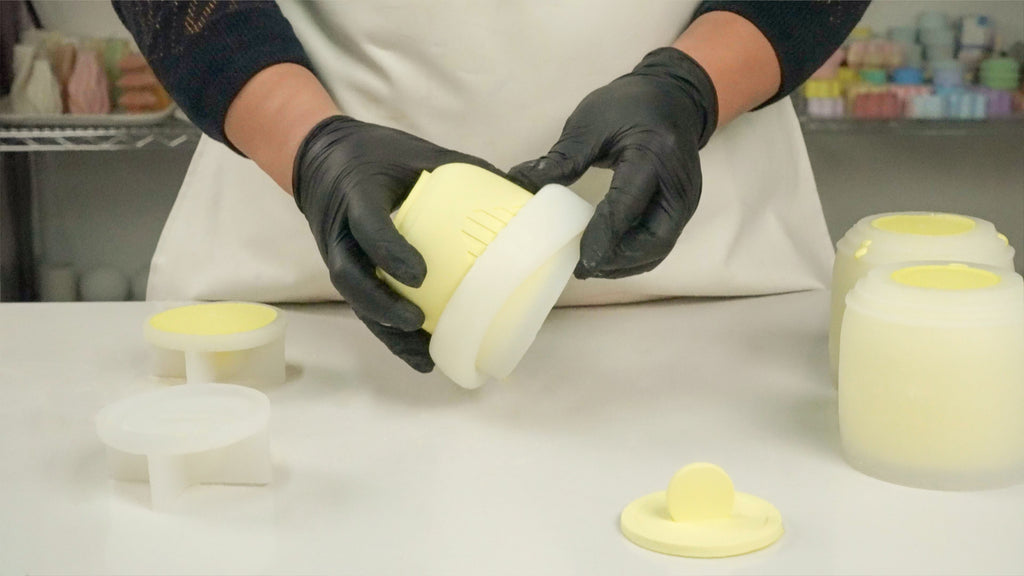
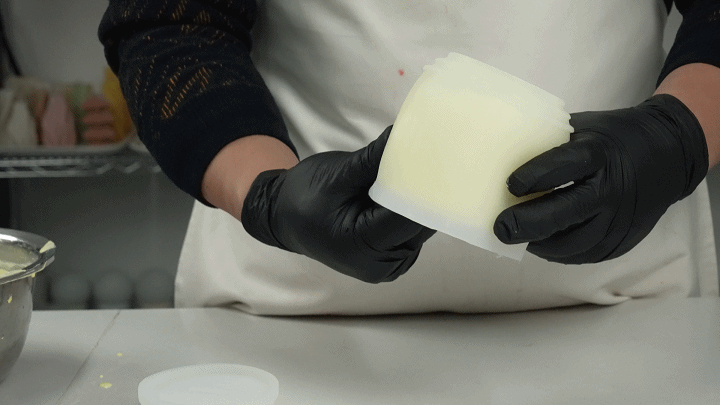
Step 10: Once the jars have been set, release them from the molds.
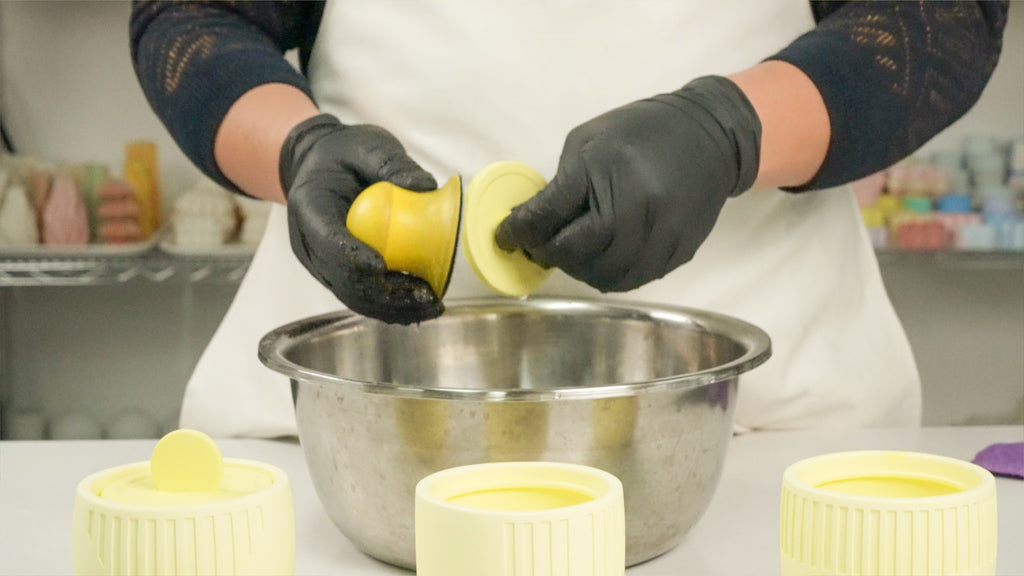
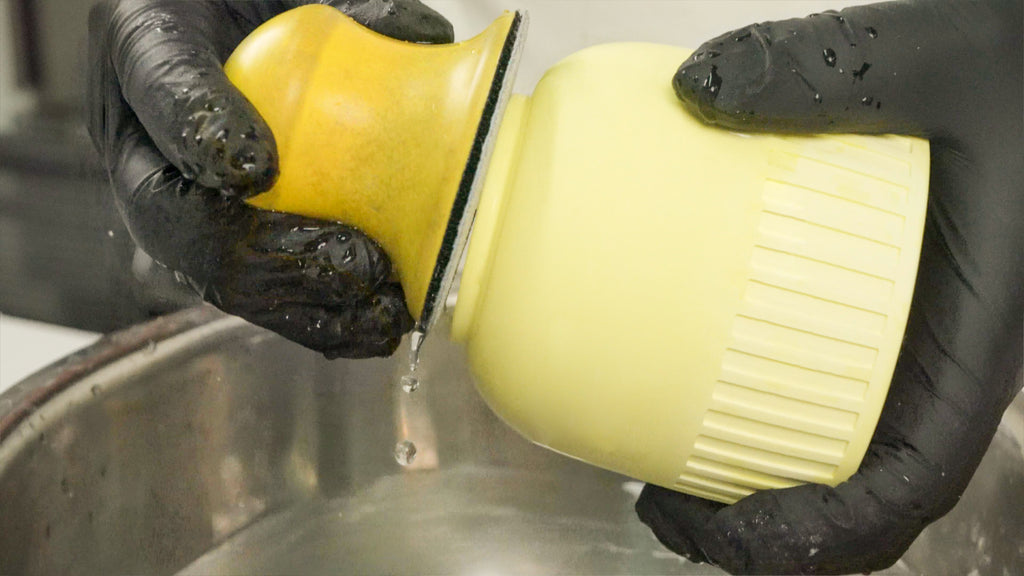
Step 11: Finally, sand and polish the candle jars to achieve a smooth finish. Start by sanding the lid of each jar with coarse sandpaper, focusing on the edges to make them as smooth as possible. Then, use fine sandpaper to smooth out the entire surface. Polish any uneven areas to ensure the jars can stand smoothly on a flat surface.
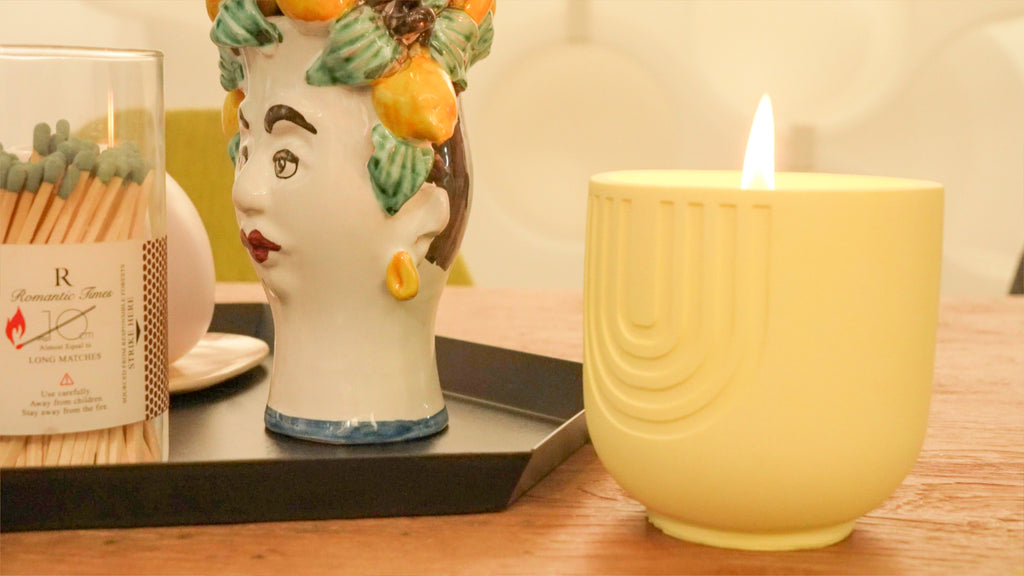
That's it! 😉You now have three beautiful candle jars with different textures that are perfect for adding a touch of elegance to any room. Remember to take your time, follow each step carefully, and enjoy the process of creating your unique candle jars!!! 🥰
Comments
Pat p said:
Love your molds. Are they safe for candles when made from jesmonite
KLEIN said:
bonjour
super la video merci j aimerai essaye de faire mes pots a bougie avec la jesmonite mais je ne sais pas si il faut mettre un sealer a l interieur du pot avant de couler la cire
merci de votre aide
Lisa said:
I love working with your products. Would you consider making a candle mold for the Yin and Yang mold like you do other vessels. It would be so nice to have replaceable candles ready for use. Thank you.
Vanessa said:
Hello, I am wondering if I get the large size simple candle jar mold, how many jars will I get out of one bag? I’m thinking it’s about 3-4 based off your article and I’m looking for a cost effective way to make candle jars on my own. Do you sell in bulk so my cost per jar isn’t $18?
Héry Frédéric said:
Bonjour. J’ai utilisé du béton portman disponible dans les grandes surfaces et mon béton se fissure sous l’effet de la chaleur ou après que j’aie coulé la cire (après quelques heures ou jours). Pouvez-vous me dire quel béton utiliser ? D’avance merci pour votre aide.
Meilleures salutations
Duthoit said:
Where can I find in your new catalog the latest mold for jesmonite and candle present on your Instagram ?
Thank you
Cat Mesquita said:
Hi Elva,
I was wondering which kind of sealer you use, if any at all, for candle jars? I wonder which one is better/safest regarding fire hazards.
Thank you for your time.
Best Wishes, Cat