


How to Make a Table Lamp
Step into the world of a sensory craftsman, where every moment is filled with creativity and joy! Today, we invite you to join us in our DIY tutorial and learn how to make your very own table lamp at home. Imagine the feeling of accomplishment and pride as you turn on your one-of-a-kind creation and see the room light up with warmth!

Whether you're a seasoned DIY pro or a curious beginner, we've got everything you need to bring your vision to life. With just a few simple tools and materials, you can let your imagination run wild and create a lamp that reflects your unique style and personality! 😉

Get ready to embark on a journey of discovery with the Table Lamp Silicone Molds and the Boowannite starter kit. with Boowannite powder, creating stunning pieces has never been easier! 😋And our skilled craftsman will guide you through each step of the process, sharing tips and tricks along the way. We promise that the end result will be worth the effort! 🥰
Are you ready to embark on a sensory crafting journey? Let’s start! 🤩
Step 1
 |
Measure out 350 grams of the powder and add 105 grams of liquid to it. Stir the mixture well until it's smooth and free of clumps. And don't forget, you can adjust the consistency to your liking by adding up to 5 grams of water. Keep stirring until the mixture is lump-free, and make sure to do it thoroughly for the best results. |
Step 2
| It's time to get creative with your color choices! Add as much or as little pigment as you desire to achieve your desired color intensity. Then stir them evenly. |
|

Step 3
 |
we'll be using our lamp mold, specially designed for crafting table lamps. The mold has two parts that align perfectly using the positioning buttons. |
|
|
Pour the mixture evenly into the mold through the two filling ports, ensuring it's filled to the brim. |

Step 4
|
To ensure a flawless final product, tap the edges of the mold to expel any air bubbles. |

|
Step 5
 |
Let the mold sit for a few hours and wait patiently for the mixture to solidify. Then,demold. |
Step 6
|
Occasionally, the channel in this base can be obstructed by plaster in its center. To ensure proper insertion into the bulb socket later on, it is essential to use appropriate tools to clear the channel. |

|
Step 7
 |
To prevent any instability or wobbling of the lamp, it is crucial to employ a sander to grind the bottom until it is even and level. |
Once the base is completely polished, we can move on to the assembly process! 😊
Step 1
 |
 |
 |
We'll start by inserting the bulb socket into the center hole of the base and securing it with a washer and nut.
Step 2
 |
 |
To ensure safety and durability, we'll then add insulation tubes over the exposed blue and red wires, and connect them to the main power cord.
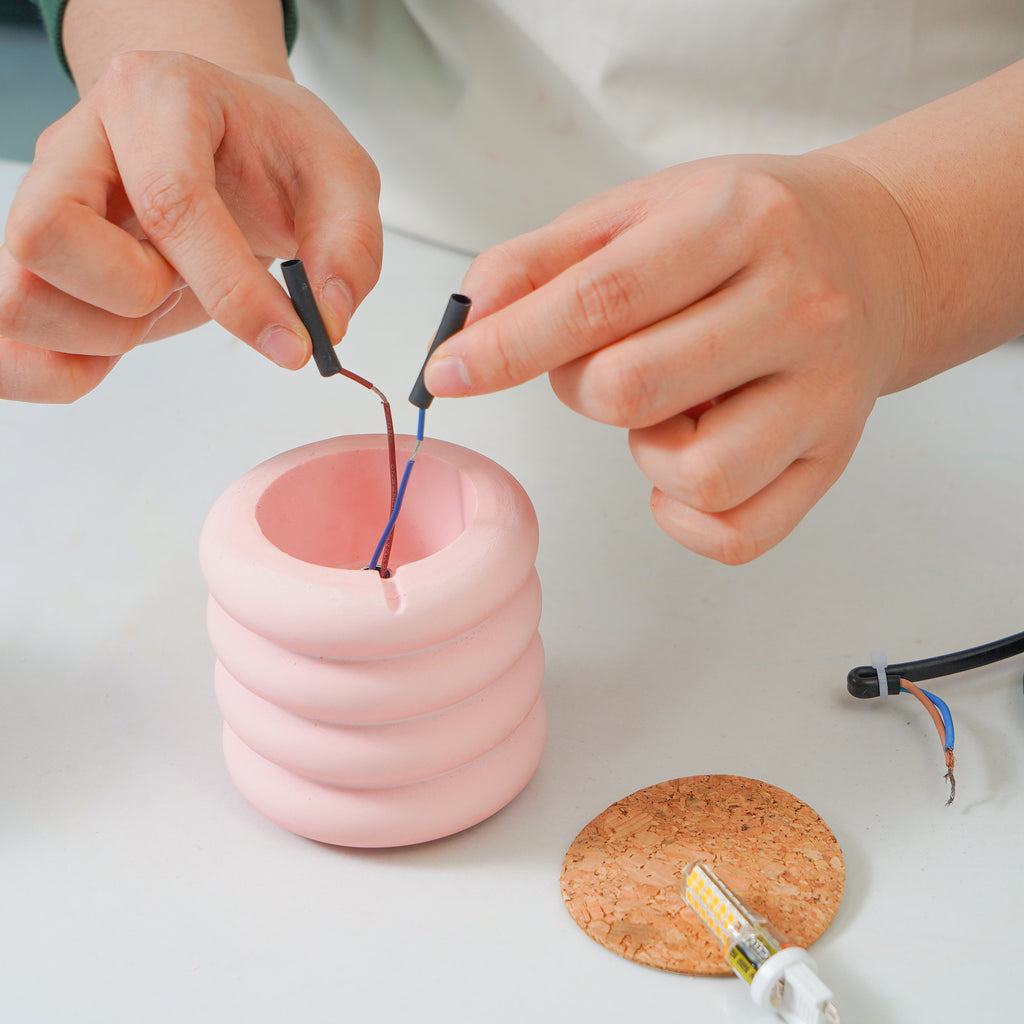
Step 3
 |
 |
We'll heat the insulation tubes to shrink them onto the wires and keep everything in the groove.
Step 4
 |
 |
To prevent any slipping or sliding, we'll attach an anti-slip pad to the bottom of the base.
Step 5
 |

|
Now comes the fun part - we'll insert a G9 bulb into the lamp holder and twist it on the bulb cover to complete the assembly.
And voila! ✨You've now created a stunning and unique table lamp that will add a touch of personality to any room in your home. With the skills you've gained, the possibilities for future DIY light projects are endless. So let your creativity soar and see what amazing ideas you can come up with next!
