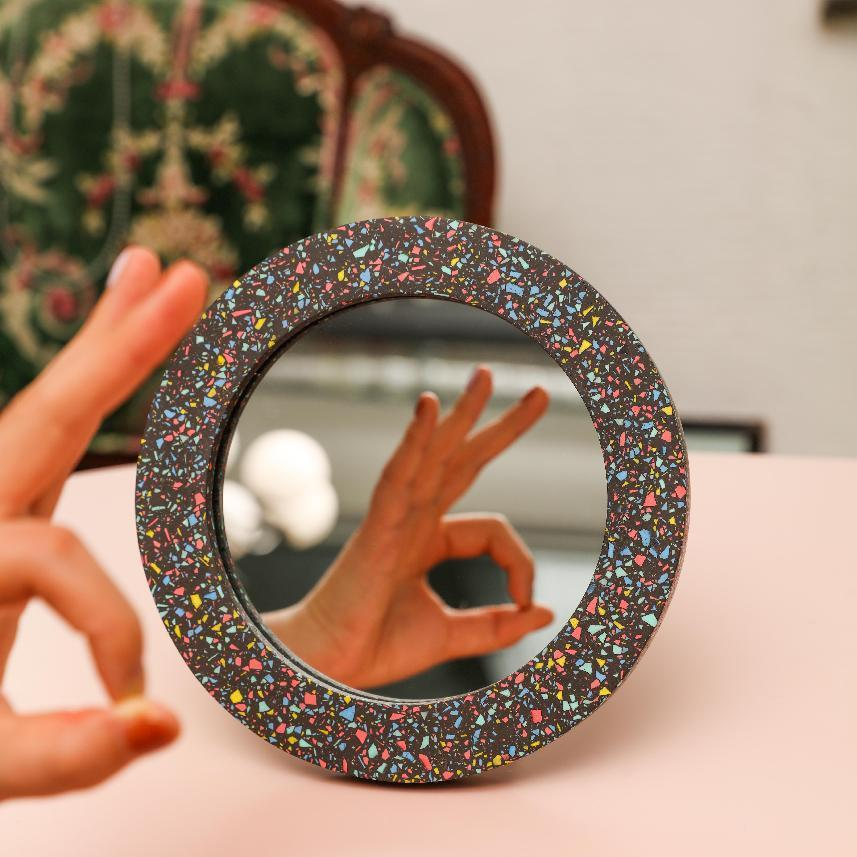
How To Use Boowannite To Make A Terrazzo Mirror
Hey guys, it's your favorite Boowan Nicole here!
I wanted to share some exciting news with you all. As you may already know, our team has been testing different materials to ensure the highest quality for our molds. One of the materials we've been trying out is Jesmonite, a popular choice in the community but often difficult for us to get our hands on. Plus, let's face it, it can be a bit pricey, especially when we're not selling finished products.
However, our team of designers has been working on a secret project for years to develop a new material that would be more cost-effective. And guess what? We've finally done it! 🎉 While it may not be as good a Jesmonite, our new material has proven to be surprisingly satisfactory. In fact, many of the products you see in our posts are made with this "secret" material and its accompanying pigments.
Initially, we had no plans to sell this material as our focus is on design and molding, not marketing. But after receiving countless comments, DMs, and emails from our fans asking about the material we use, we realized that we couldn't keep it a secret any longer. And after being called "selfish" by one of our longtime fans, we knew it was time to share our innovation with the community.
So, without further ado, we introduce to you Boowannite! 🥰Boowannite is an environmentally friendly composite material made of a combination of resin and gypsum. It's a cost-effective alternative to Jesmonite AC100 and can be used to create a variety of designs. We believe that Boowannite will bring you a more interesting experience with affordability.
We are so excited to finally share this with you all and hope that it will help make your purchases worry-free. Thank you for your continued support, and we can't wait to see what amazing designs you'll come up with using Boowannite! 🤩
And then this blog will provide a detailed step-by-step tutorial for making a mirror out of Boowannite. 😊
Prepare the tools and materials you will use
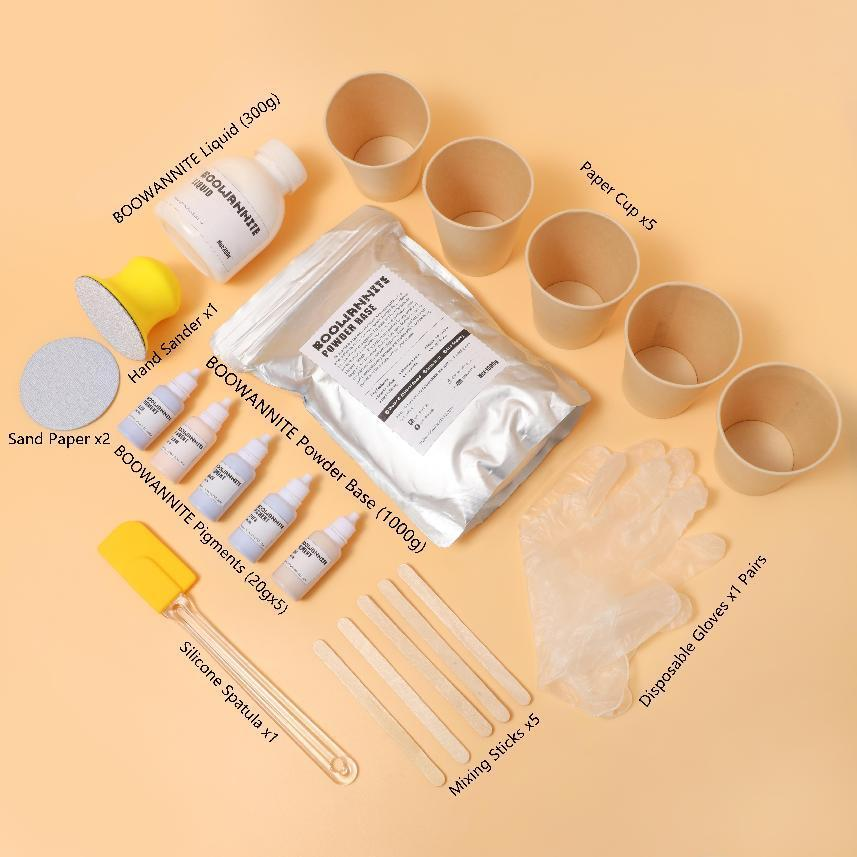
You will need a Boowannite kit*, a container, cling film, a mirror mold, and mirror accessories*.
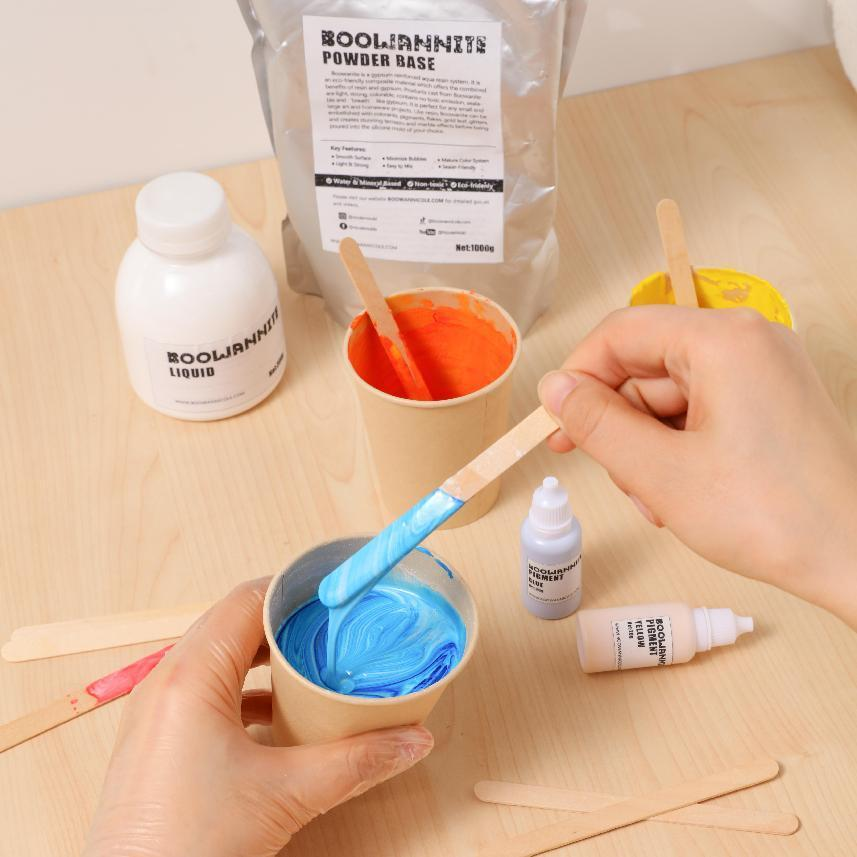
Boowannite kit* including a Boowannite powder base, a Boowannite liquid, 5 pigments, a sander, a silicone spatula, 2 sandpaper, 5 paper cups, 5 wooden sticks, and a pair of gloves (as shown in the picture below)
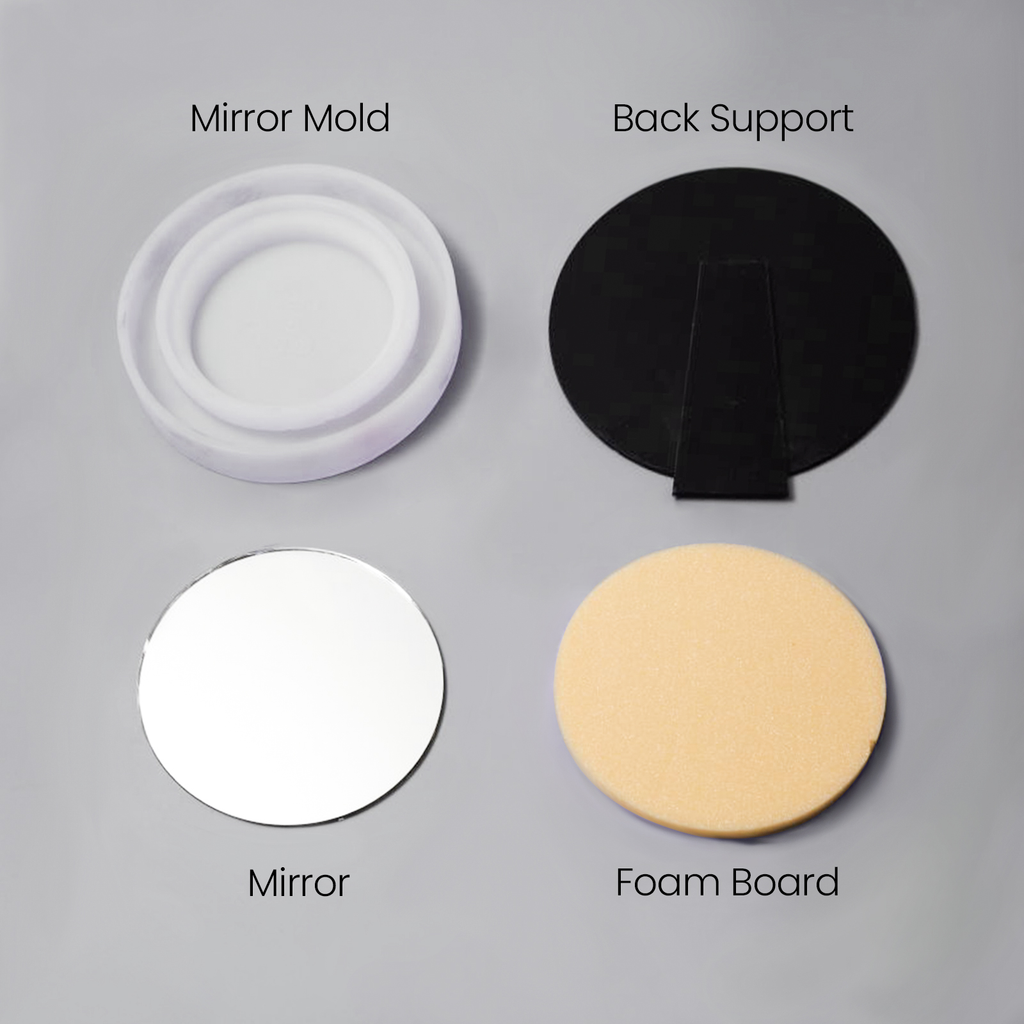
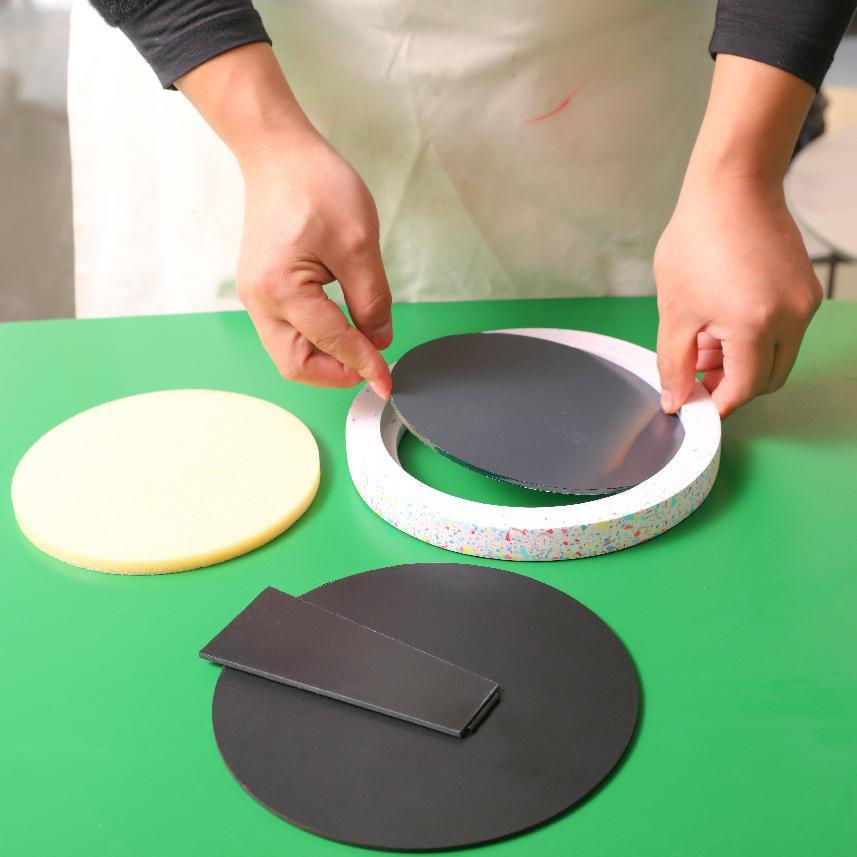
Mirror accessories* including a back support, mirror glass, and a foam board.
And you also need to prepare a mirror silicone mold. Make sure it is clean and free from any dust or debris.
Prepare the terrazzo pieces
Step 1: Prepare the cling film first.
Step 2: Lay the cling film flat on the table.
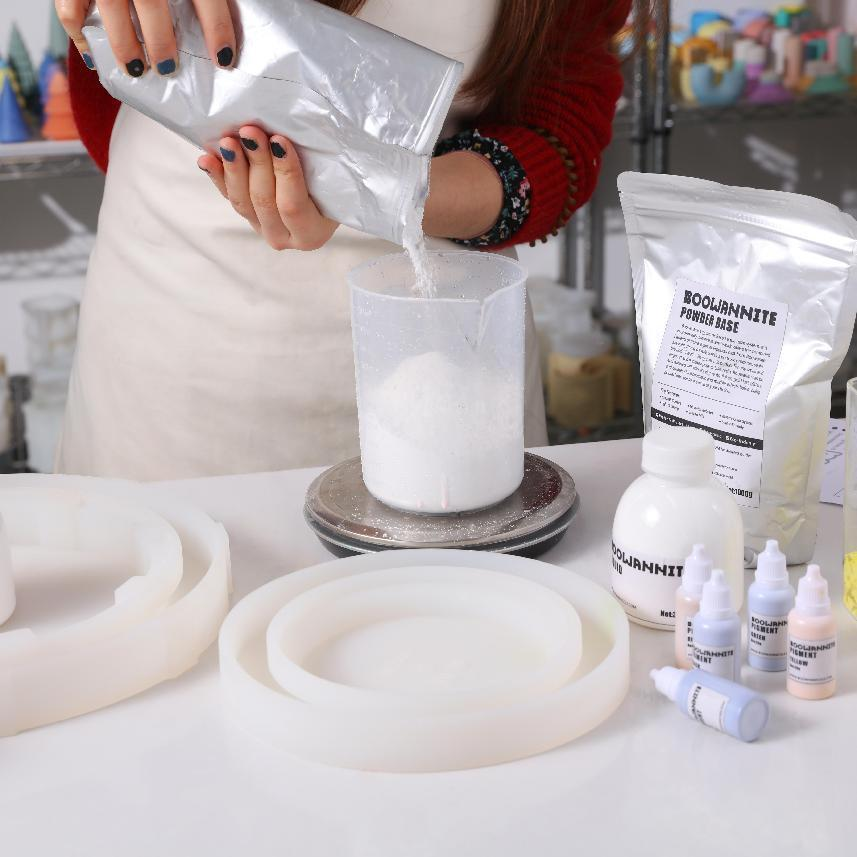
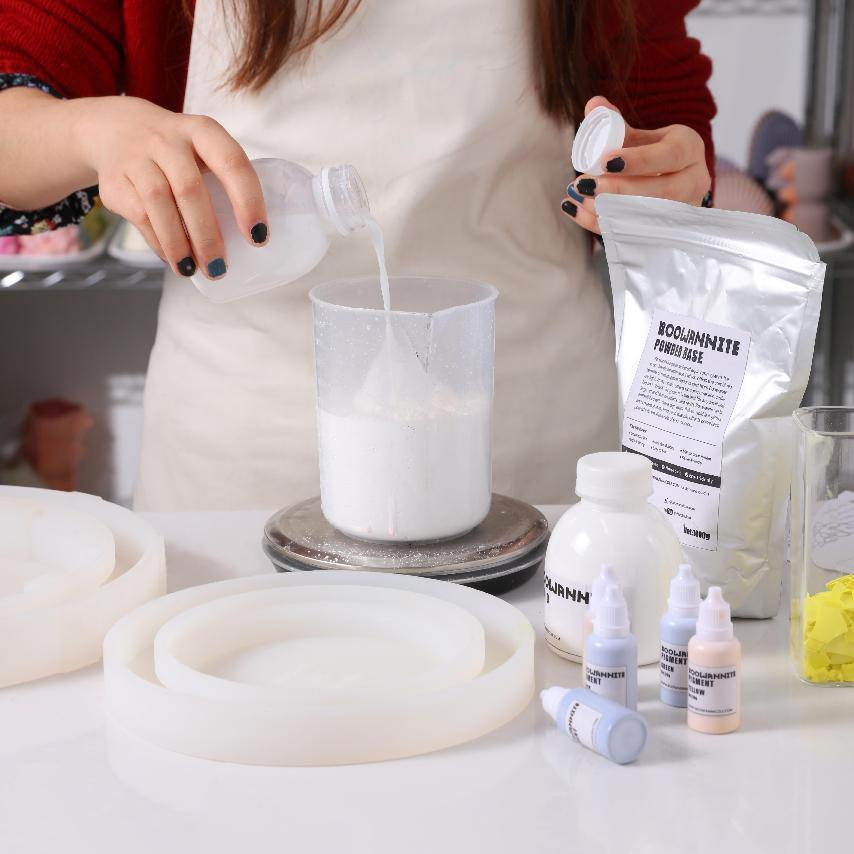
Step 3: Prepare Boowannite, pour the powder base into a paper cup, then add liquid. Mix them with a wooden stick. This is something you can make more of and keep on hand for future use.
(Tip: 100g liquid for 300g powder)
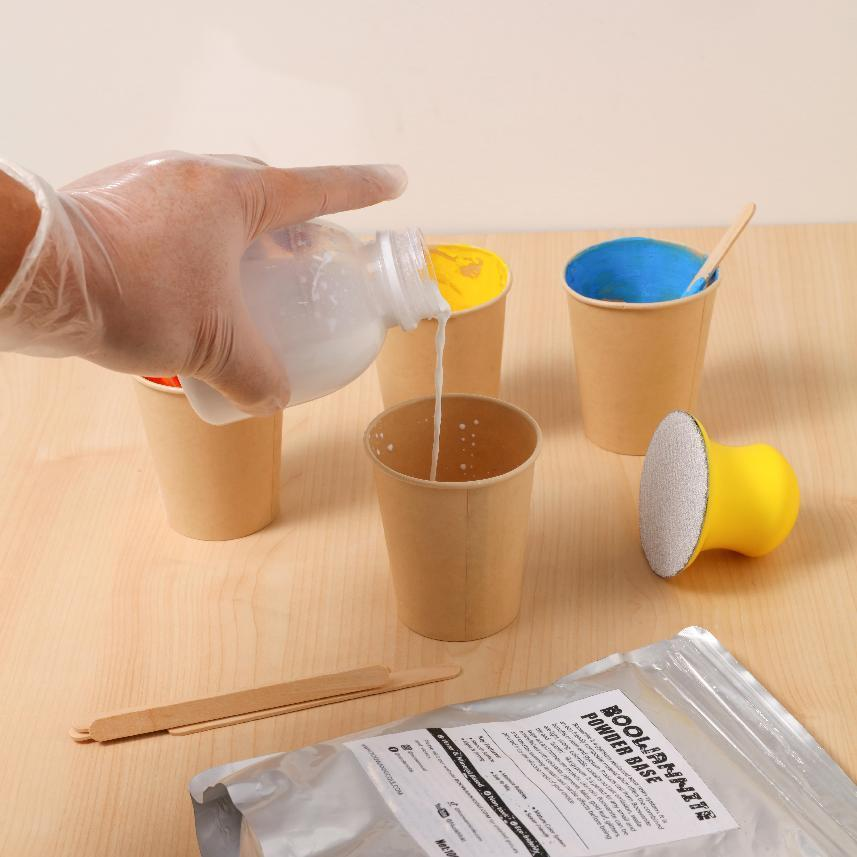
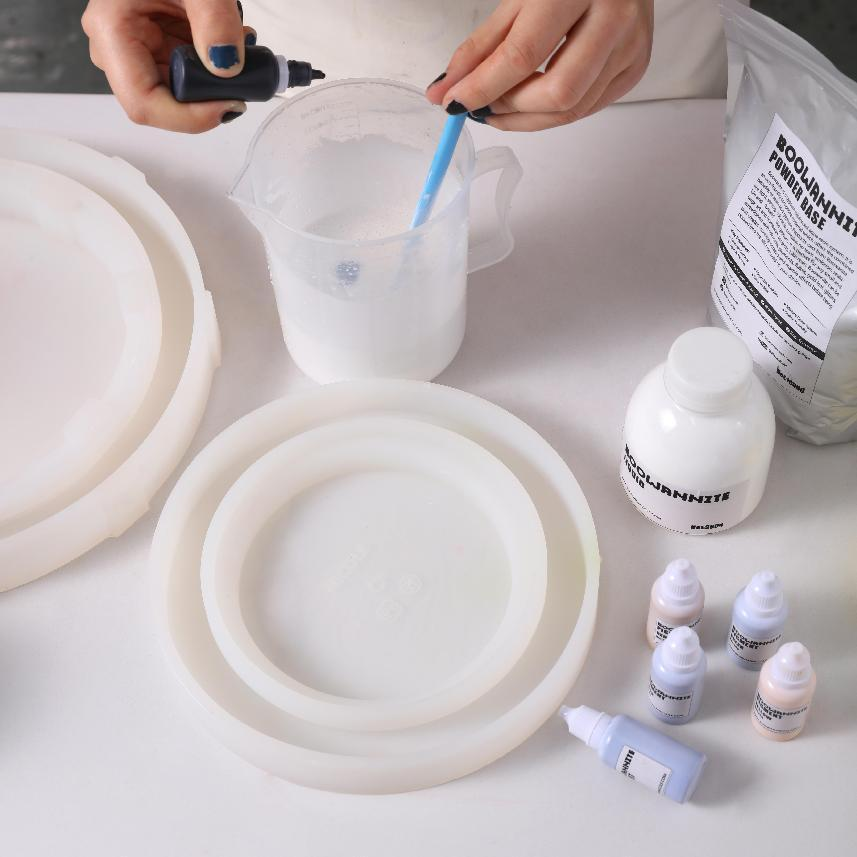
Step 4: Once no particles are visible in the mixed paste, add a drop of pigment. Then mix them up. There are five pigments in our kit, so you can choose your favorite color or make one of each.
Step 5: Spread the colored paste on the cling film and then use the silicone spatula to smooth the paste. Let it spread in a thin layer on the cling film.
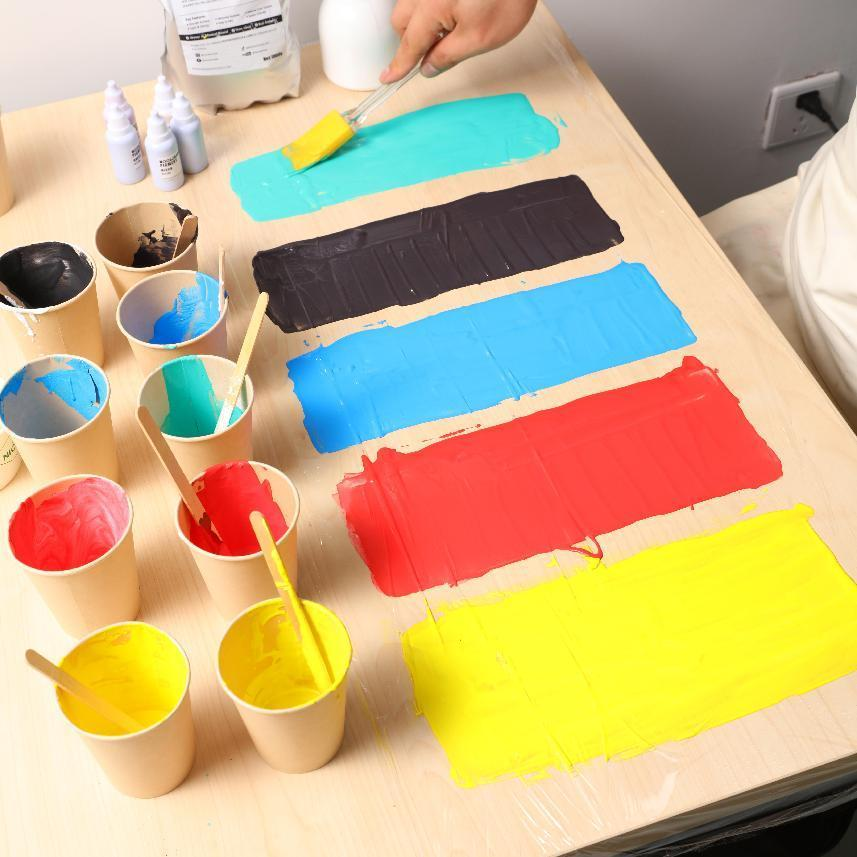
Step 6: Wait for the colored paste to set and dry.
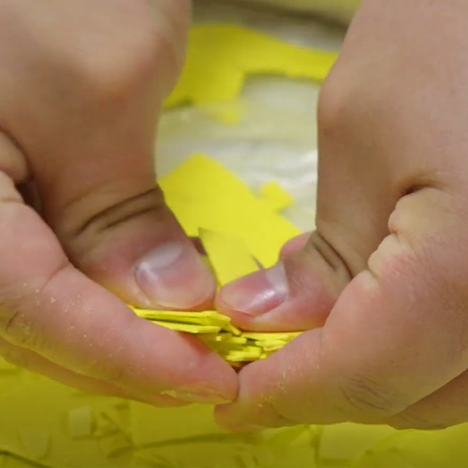
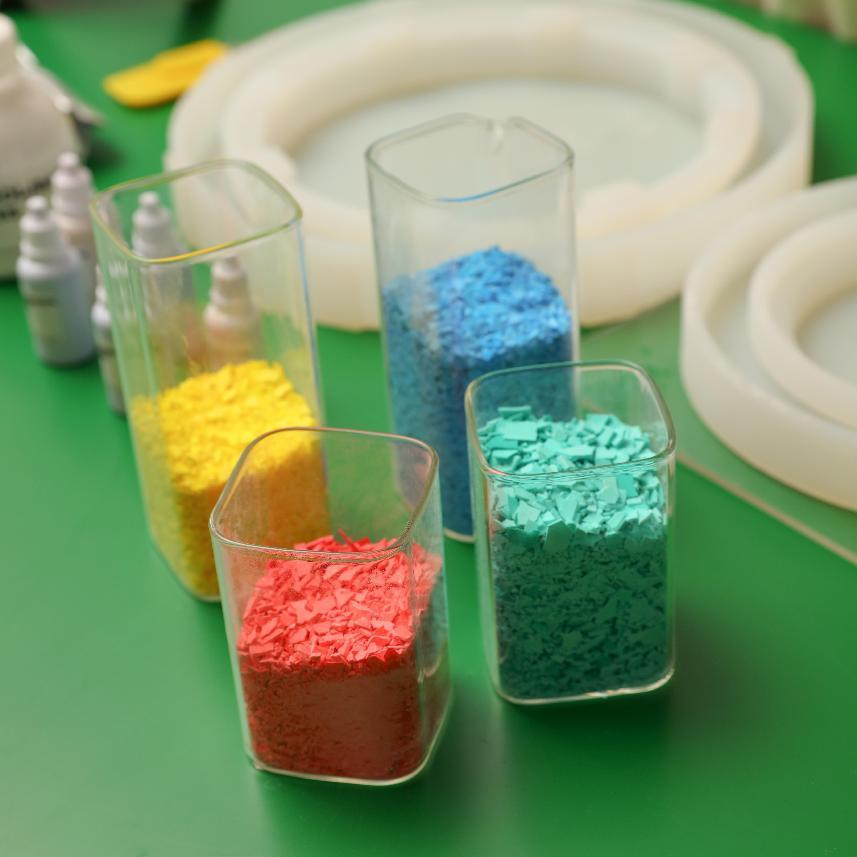
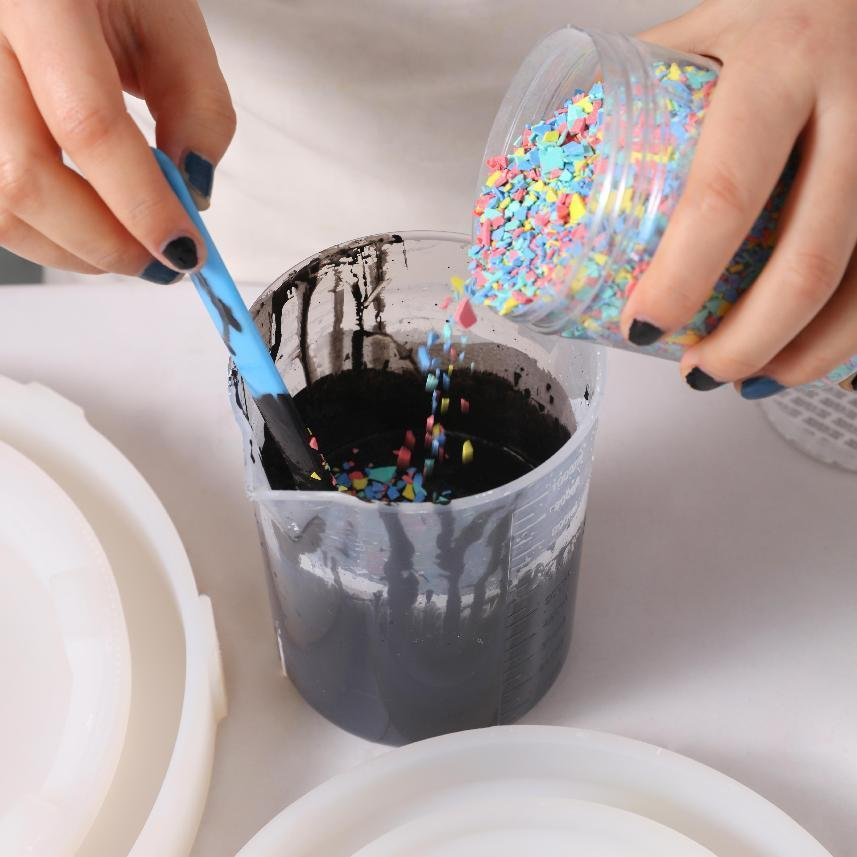
Step 7: Crumble the solidified material and collect the pieces into a container. You can make more pieces like this in different colors, the more colors the better they look.

Prepare the material used for the mirror
Step 1: Prepare the Boowannite. Mix the Boowannite powder and Boowannite liquid according to the instructions on the packet, and use a wooden stick to stir until a thick paste is formed.
(Tip: 100g liquid for 300g powder)
Step 2: Add a drop of pigment into the Boowannite paste. Then mix them up.
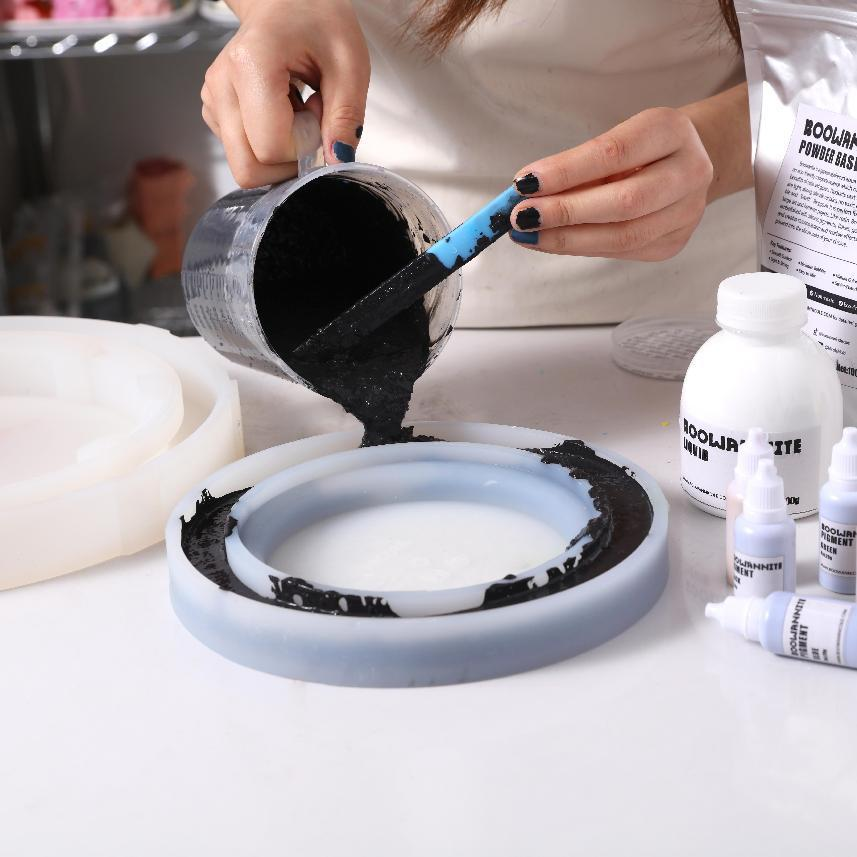
Step 3: Add the pieces made in the previous step and mix well.
Step 4: Pour the Boowannite paste with pieces into the silicone mold. Make sure it is filled to the top, and then tap the mold gently on a flat surface to remove any air bubbles.
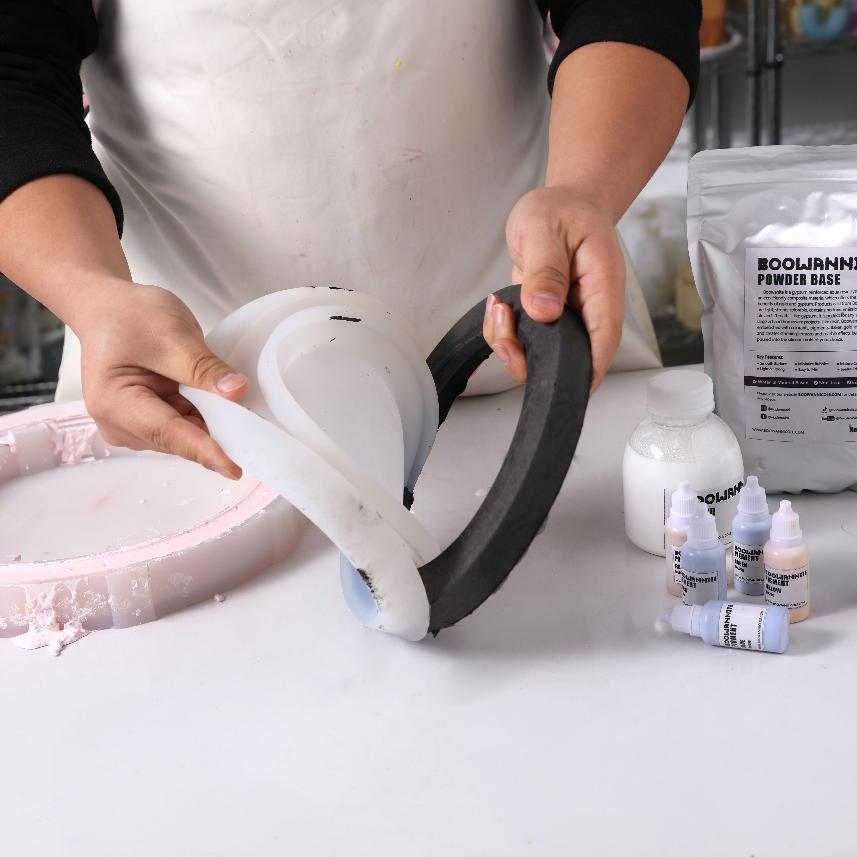
Step 5: Allow the Boowannite to cure. This usually takes between 2-3 hours, depending on the size and thickness of the object you are casting.
Step 6: Once cured, carefully remove the cast object from the silicone mold.
Polishing and installation
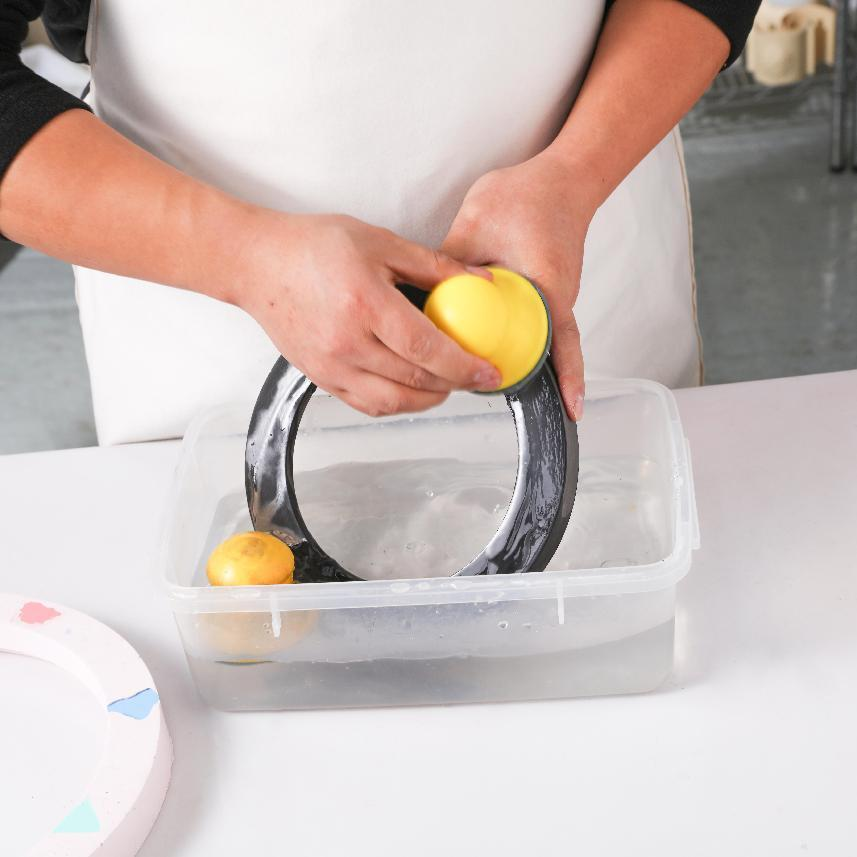
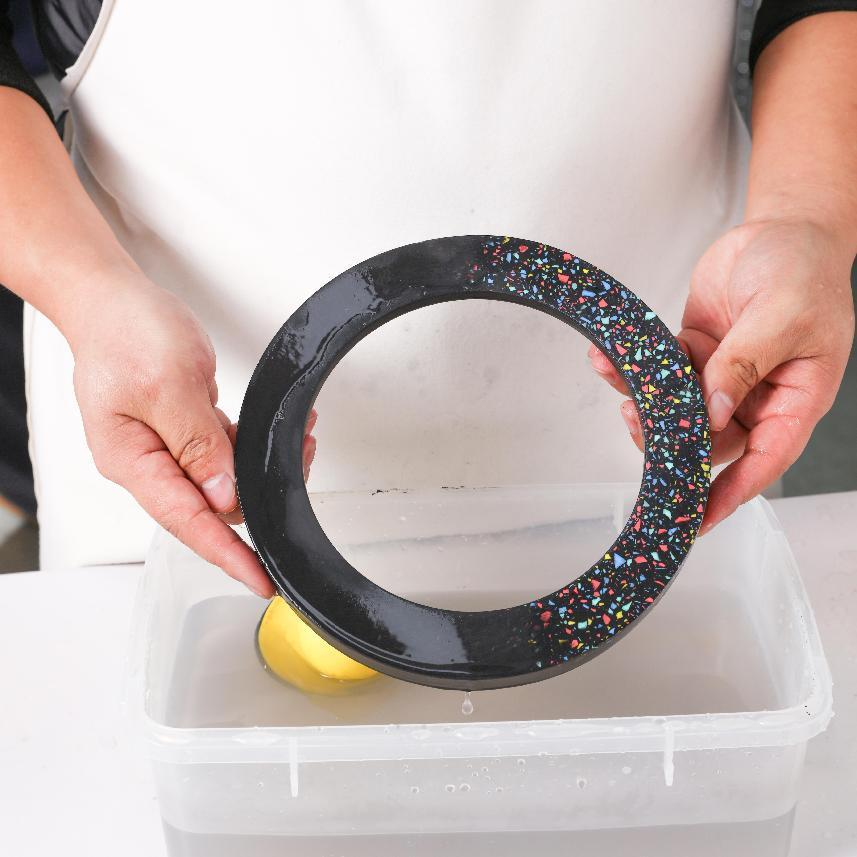
Step 1: Polish the object. This can be done by sanding the surface with a very fine grit sandpaper, then polishing it with a soft cloth.
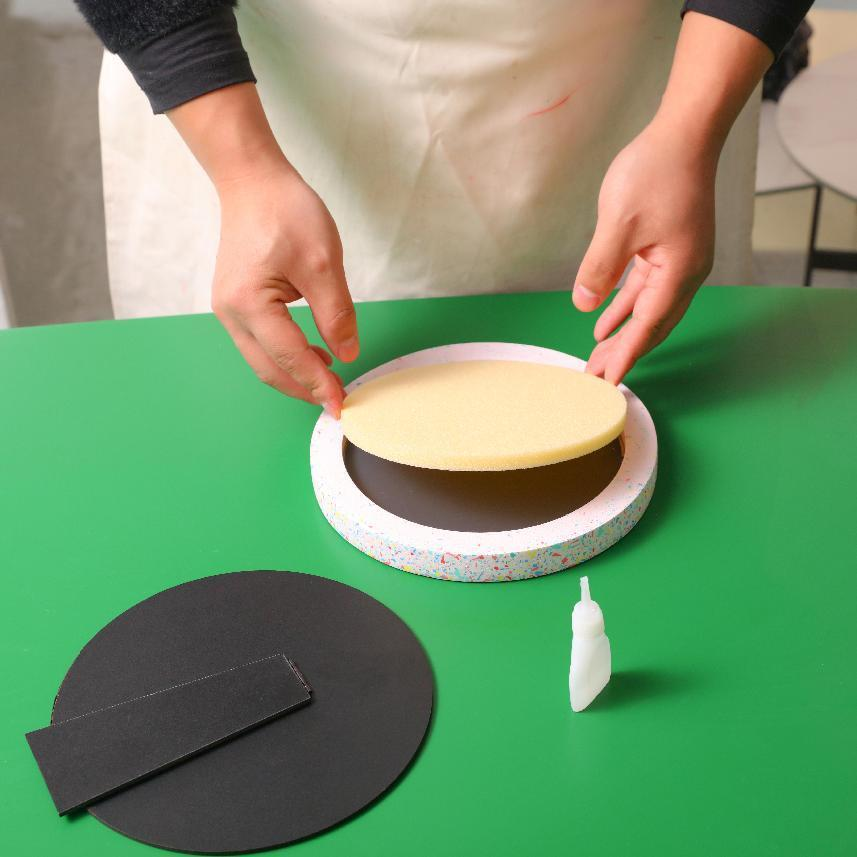
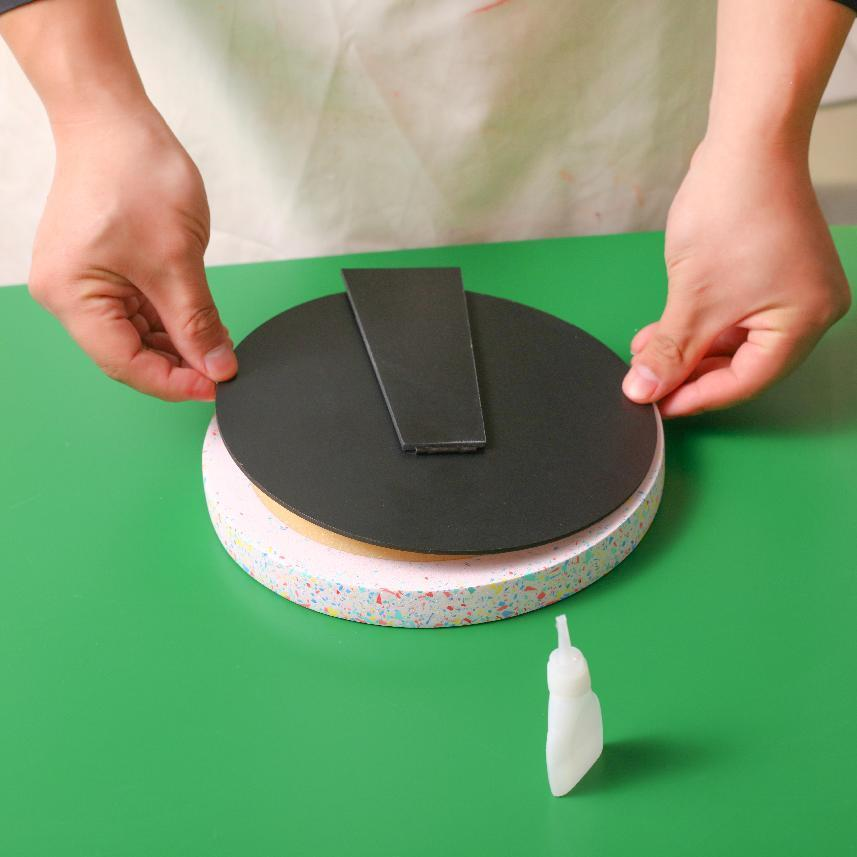
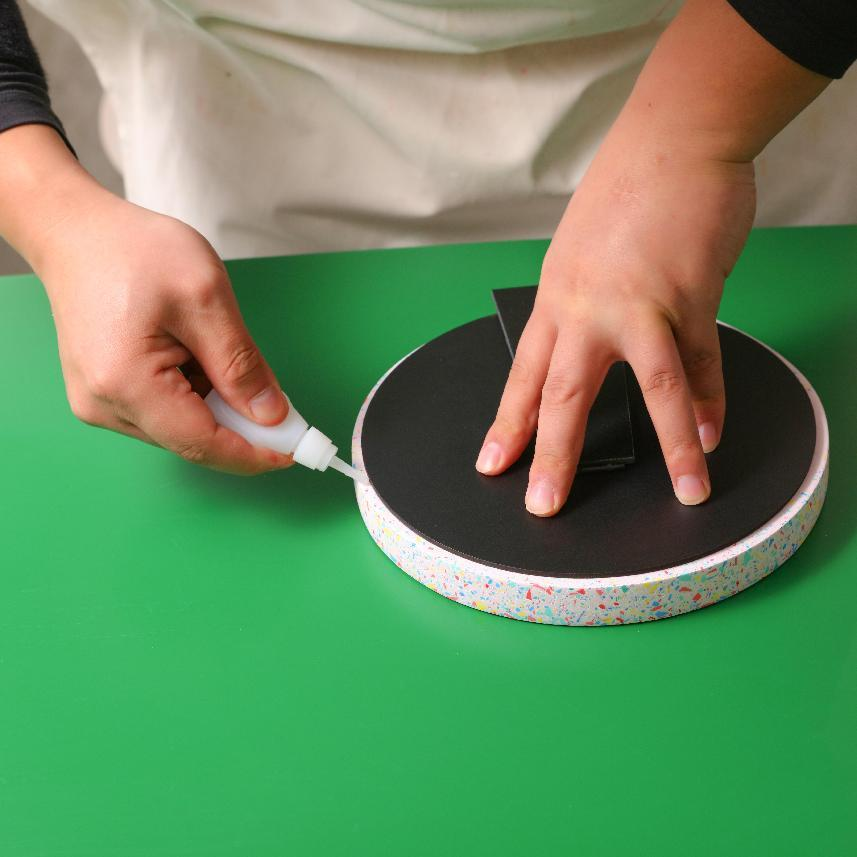
Step 2: Put the mirror glass in the mold and then put in the foam board. Next, add some glue to the foam and put in the support. Finally, seal the support with glue.
And there you have it! 🎉 Your own unique and creative Booewannite mirror. This project is a great way to show off your creativity and make something that is both beautiful and practical.